Parking Schedule
The parking Schedule tab is used to Add, Edit, or Delete all Parking Schedule to be used for reserved parking in the system.

Adding New Parking Schedule
- To add a new parking schedule, you must select a
 from the dropdown list. The Location Id’s correspond to the locations added in the Parking Location tab.
 - Next type in a
 from the dropdown for the parking schedule being created. These Parking locations were entered on the Parking Location Tab.
 - Now select the
 from the dropdown that will be used to reserve spaces in this parking in this lot.
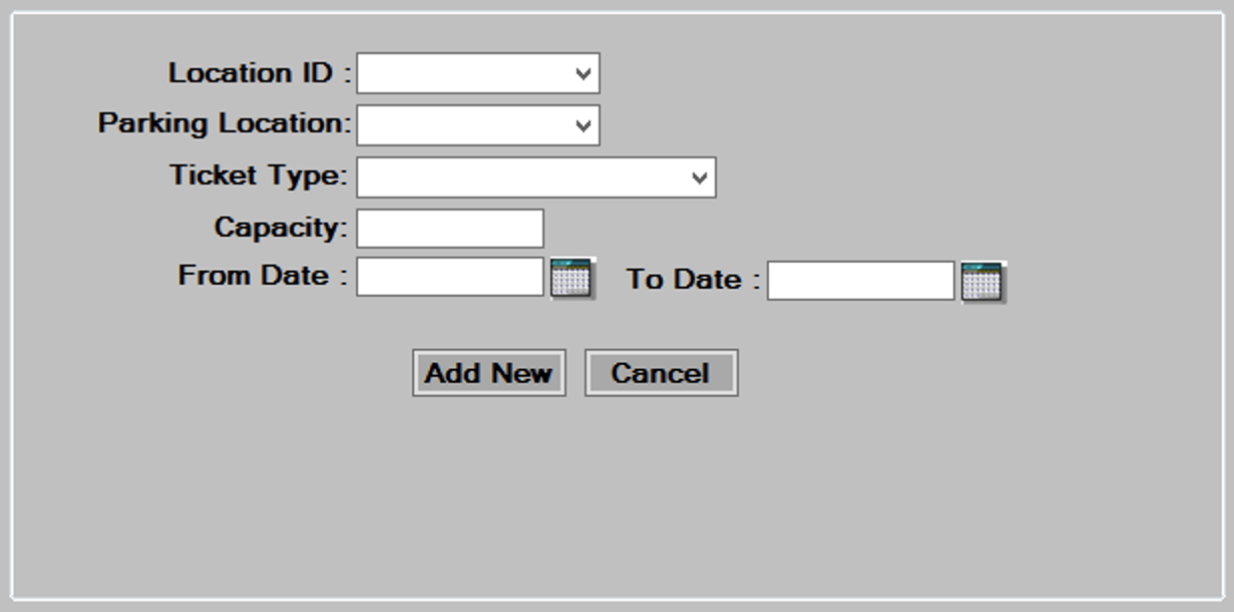
- Enter the
 of this lot, in number of cars. The maximum capacity which was set when creating this Parking Location in the Parking Location tab will pre-fill in this field. You can change this value if you choose.
 - Enter the
 range that you are building the parking schedule for.
 - Press the
 button to add this parking schedule, and press
  to continue.
Editing/Deleting Parking Schedule
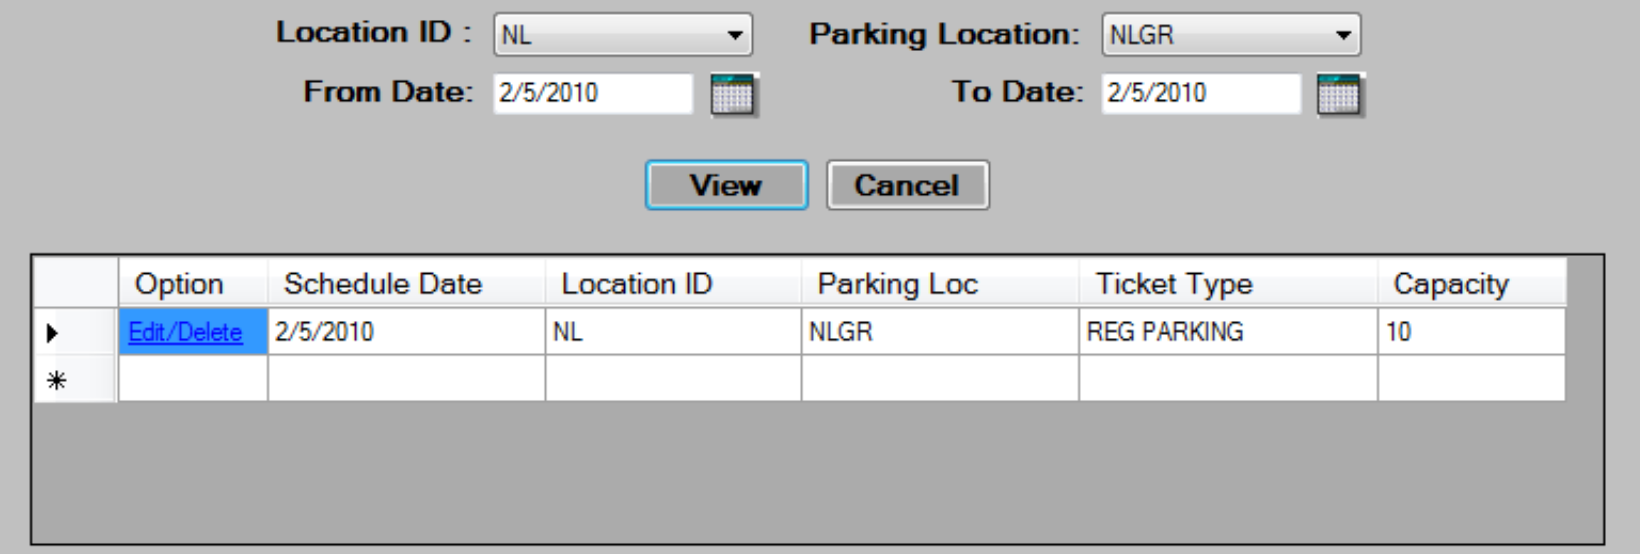
- Select from the filter criteria shown above, and then press the
 button to display the existing schedule entries.
 - Hit the
 button to the left of the parking schedule you wish to edit or delete.
 - The bottom of the screen will populate with the information about the vehicle type youselected.
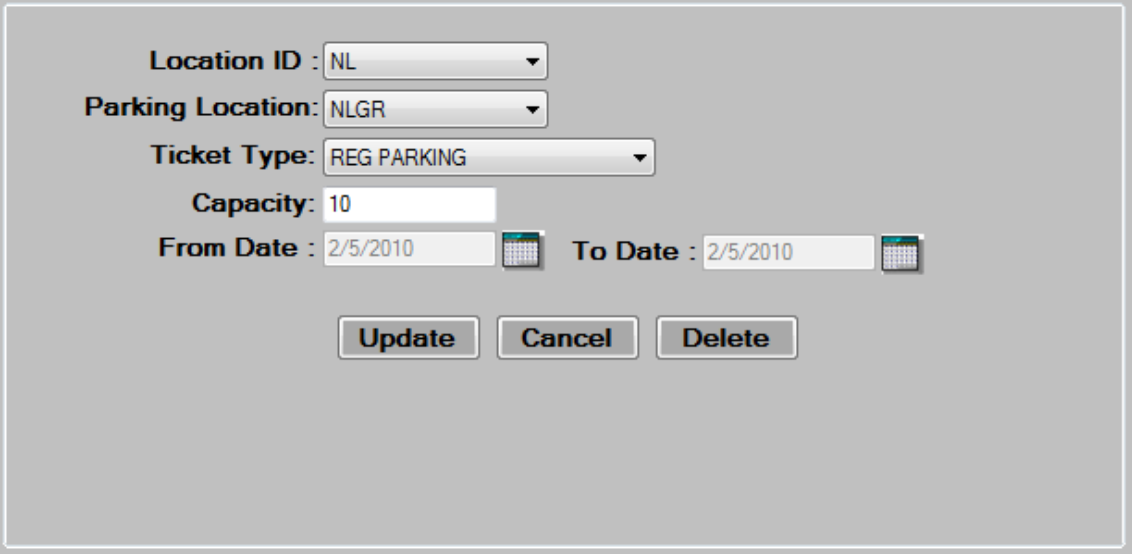
- Edit the data in the desired fields, as required. See the Adding New Parking Schedule section for a description of each field.
- Press the
 button to save changes then, press to continue.
 - To delete, select a Parking Schedule by pressing the link, then press the button at the bottom of the screen. Press to continue.