Discounts
The discounts tab is used to set up all the discounts in the system.
adding new discounts
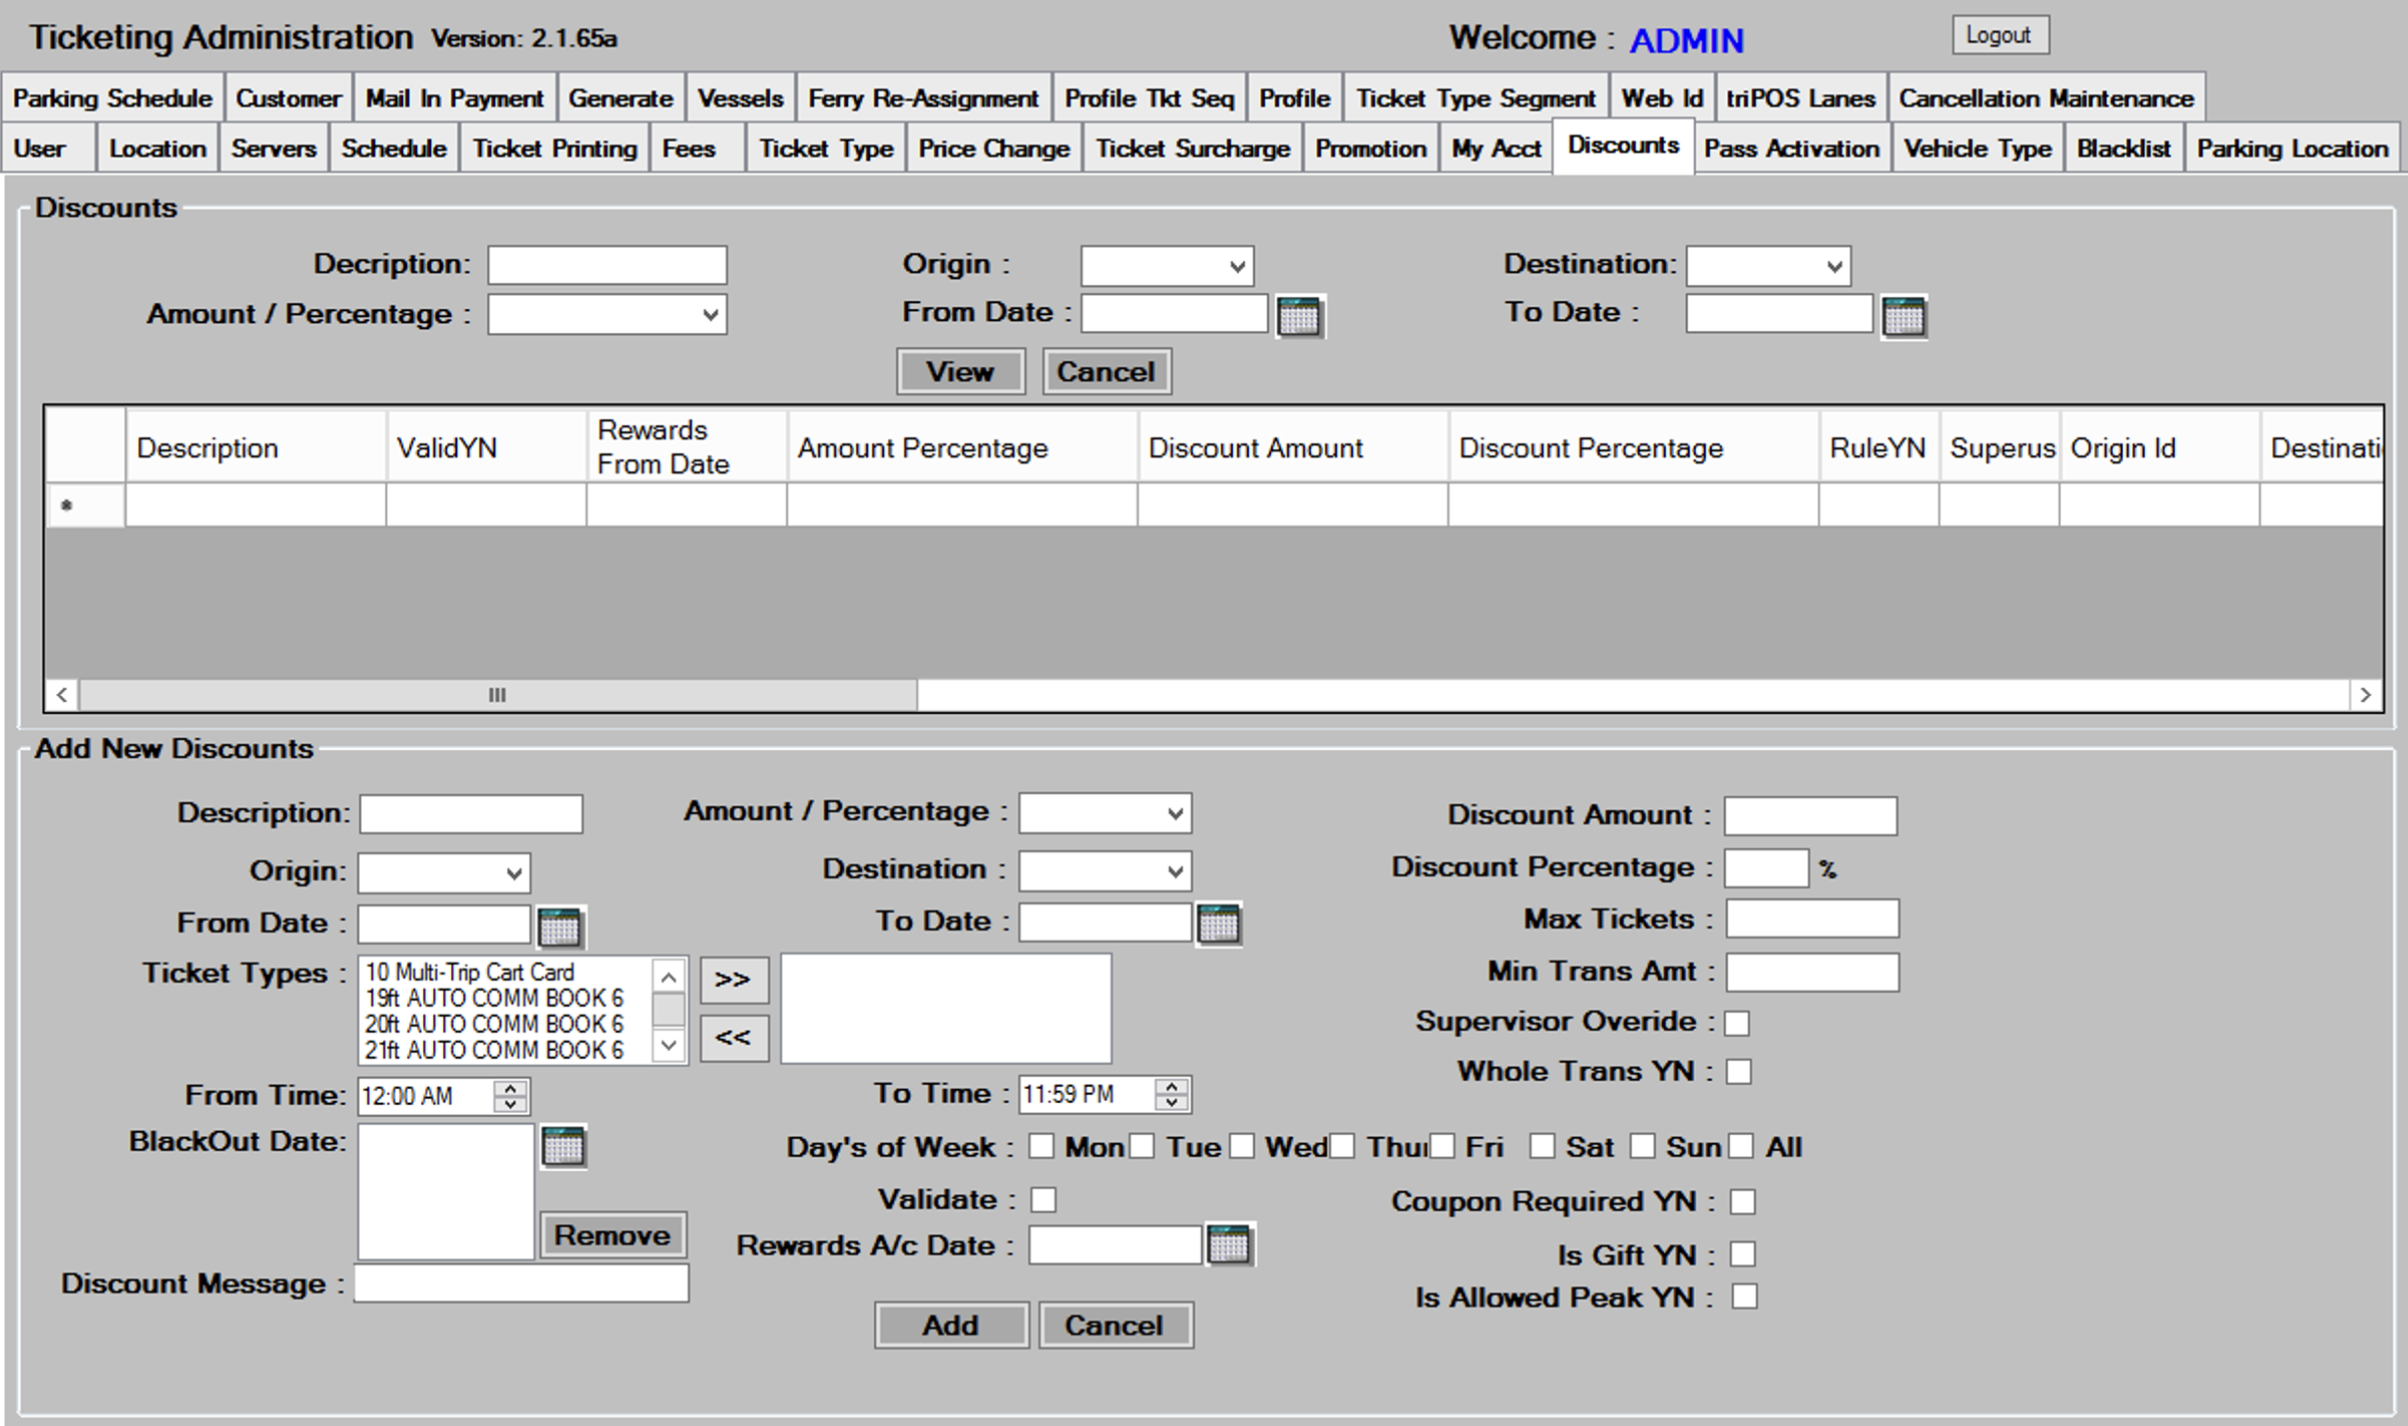
- In the Add new discounts section, enter the
 for this discount.
 - Enter the
 for this discount. Choose amount for a flat amount offdiscount, or percent to create a percentage of discount.
 - Enter the
 if an amount type discount was chosen, enter the
  if a percent type discount was chosen.
 - Enter the
 and
and  to be associated with this discount from the drop down boxes. Leave blank for all origins and destinations.
 - Enter the
 and
and  range that this discount is valid for. The discount will not be valid for dates outside of this date range.
 - Enter the
 this discount can be applied to per transaction.
- Choose the ticket types that the discount is valid for. To select the ticket types, click on the appropriate ticket types in the left box, and press the
 to move the ticket type to the box on the right. Discount will only work for ticket types in the box on the right.
 - Enter the
 that this discount can be applied to. This amount is only used for a whole transaction type discount.
 - Check the
 check box if a supervisor override is required in order to apply this discount.
 - Check the
 check box if this discount applies to the whole transaction, and not to a specific ticket type. Whole transaction discounts can only be a percent type discount due to the fact that the discount amount cannot be applied to the tickets equally for a n amount type discount.
 - Enter the
 and
and  range that this discount is valid for. The discount will not be valid outside of this time range.
 - Check off the days of the week this discount is valid for. If valid for all days, check the All check box.

- If there are blackout dates for this discount, click the calendar, and select the date to add it to the Blackout Date box.
- Check off the
 check box if validation of a discount coupon serial number is required for this discount.
 - Check off the
 check box if collection of a coupon at the POS is required for this discount.
 - Check off the
 check box if this discount is a gift certificate type discount. This check box is necessary to make the association between ticket types and gift certificates for pass activation at the POS.
 - Click the
 button to add a new discount, and then press
  to continue.
Editing/Deleting existing Discounts
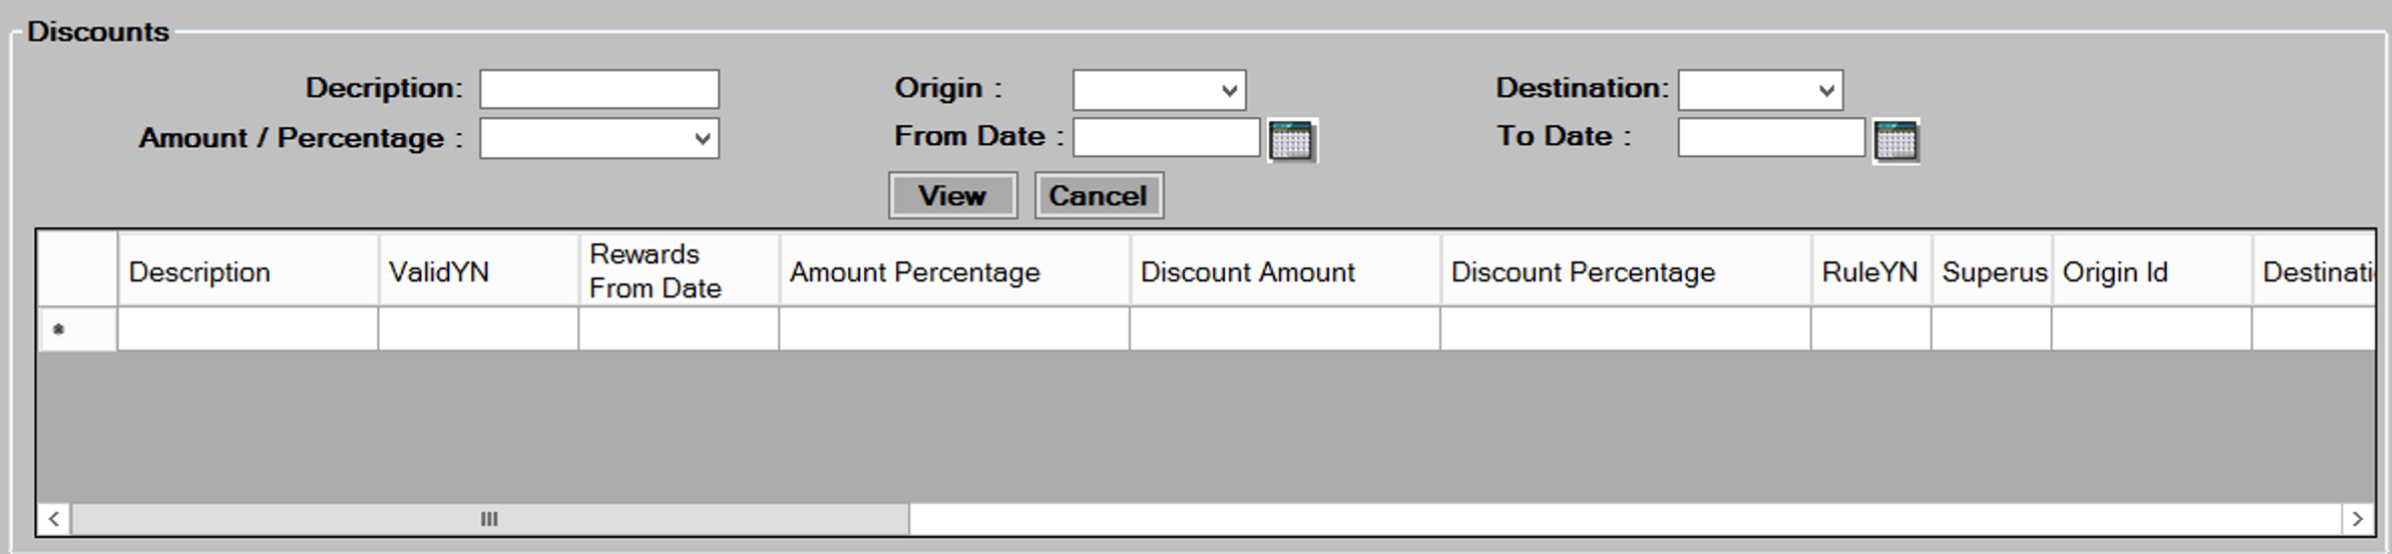
- Select from the filter criteria shown above, and then press the
 button to display the discounts.
 - Scroll to the appropriate discount, and then press the
 link to load the existing data into the screen for editing.
 - Edit the data in the desired fields, as required. See the Add New Discounts section for a description of each field.
- Press the
 button to save changes then, press to continue.
 - To delete, select a Discount by pressing the link, then press the
 button at thebottom of the screen. Press to continue.