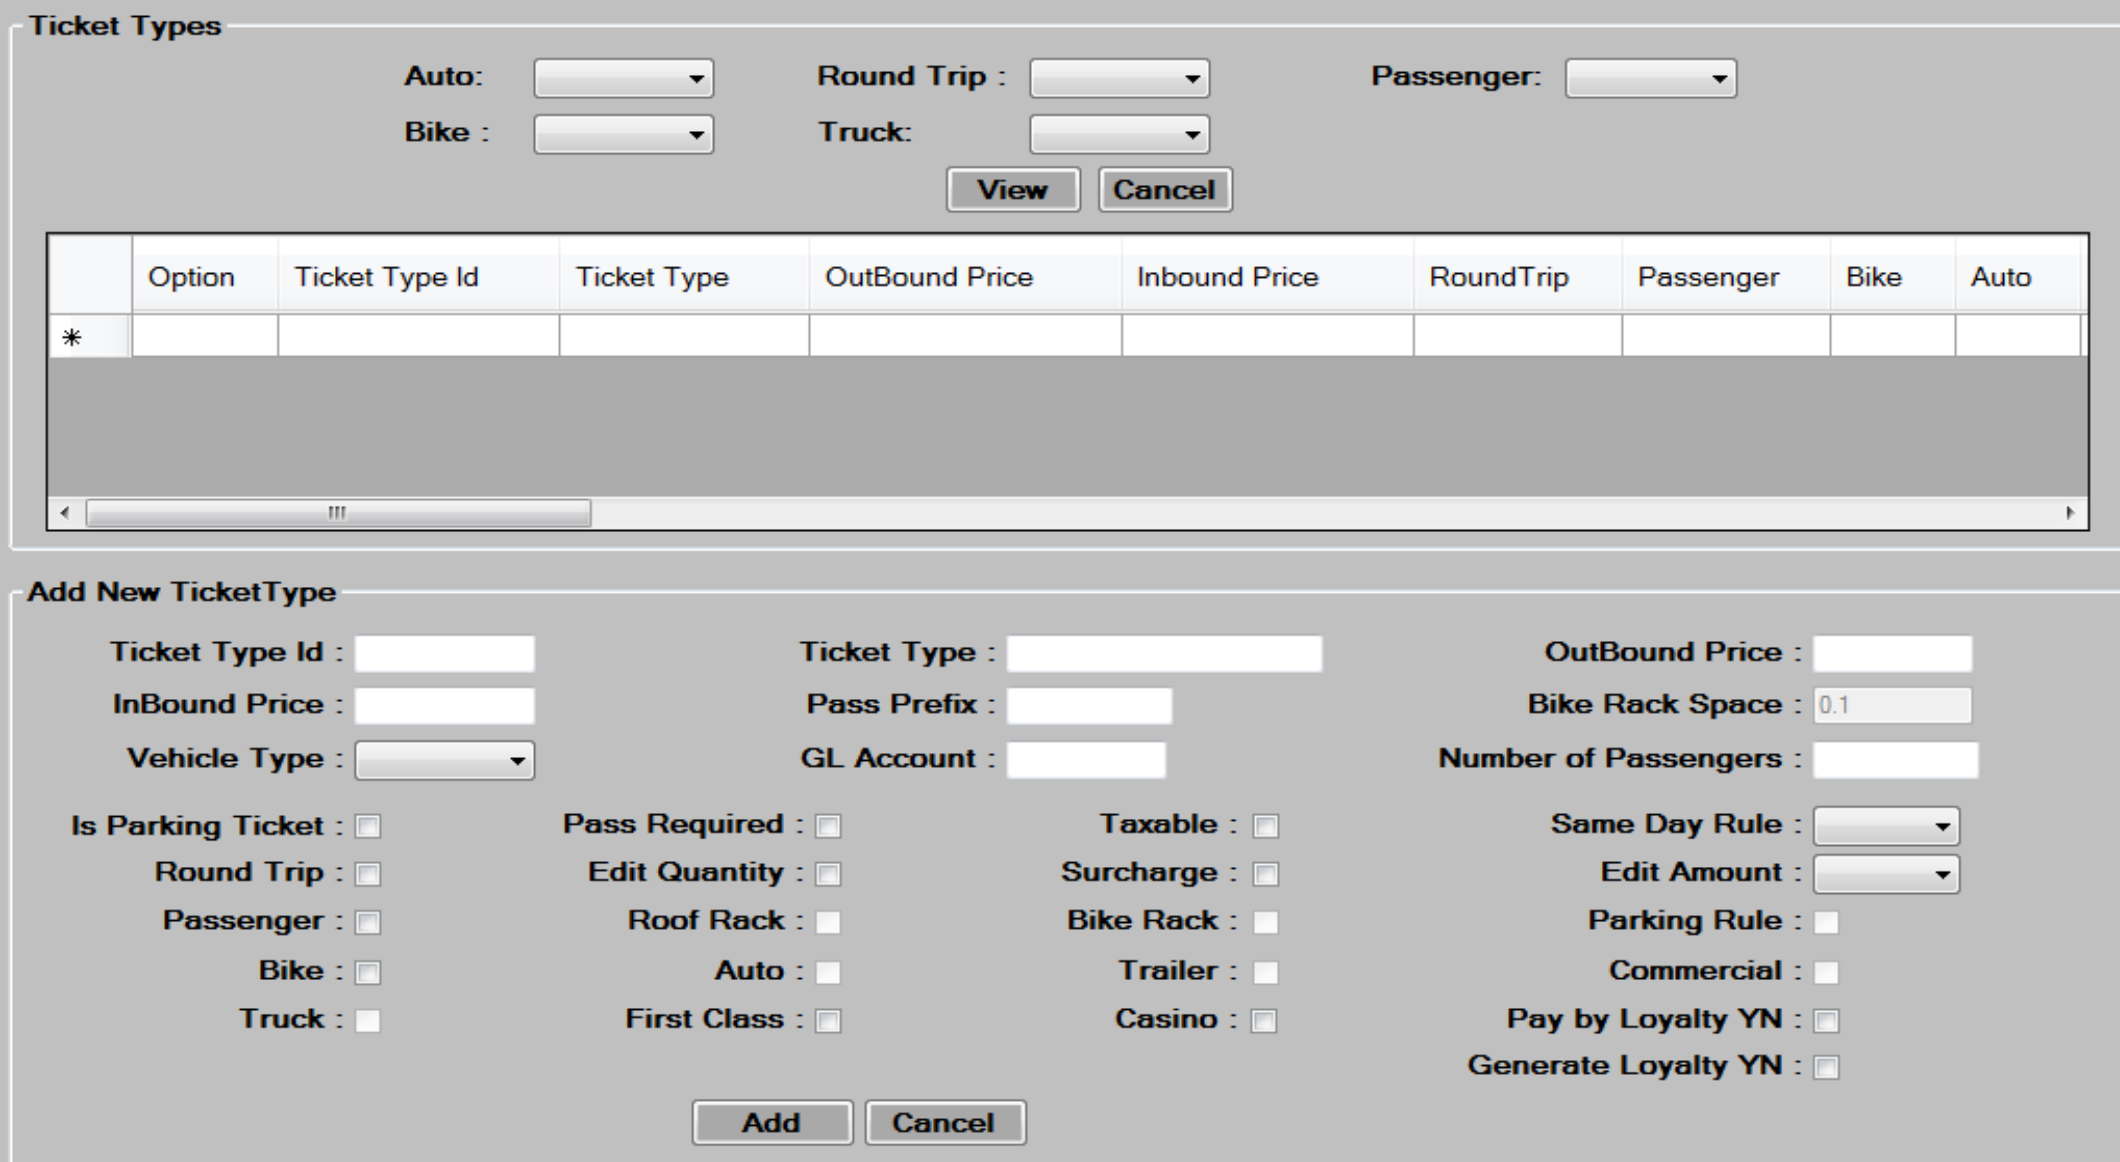
Ticket Type
The Ticket Type tab is used to set up and edit all ticket types in the system.
adding new ticket types
- Enter the
 . This number must be unique from previously used numbers. Ticket Type Id’s 9548 (Captains Card), 9549 (Standby Slip no res), and 9550 (Standby slip with Res) are hard coded into the system and should not be changed.
 - Enter a
 for this ticket being defined. This is a descriptive field and is what displays in the profile and on reporting when displaying the ticket type.
 - Enter the
 and
and  . Inbound price is only used on a RT type ticket. These prices are only used if valid price tracks are not found. If price tracks are used for this ticket type, then these prices would get set to 99999.99 or higher, which indicates to the system that these ticket types are not valid for the departure selected.
 - Enter the
 field. This field is used by some reports for GL subtotaling. Entering a like value here with other ticket types will cause them to be grouped together on some GL reports.
 - Enter the
 from the dropdown. The vehicle types which display here are set up using the Vehicle Types tab in the administrative module. If the ticket is not a vehicle, this field would be left blank.
 - Enter the
 value. This field is used by some reports to create subtotals by GL accounts. This is the primary subtotal account on the GL reports, and Pass Prefix field is the secondary subtotal field. Like values on ticket types will cause tickets to be grouped together for subtotaling on GL type reports.
 - Enter the
 to be deducted from capacity when using this ticket type.
- Enter the
 field from the drop down. Select Y if the inbound (return) ticket of a round trip ticket must be for the same day as the outbound. Select N if the inbound (return) ticket of a round trip ticket must be for a different day than the outbound. Select X to ignore this rule for this ticket type.
 - Enter the
 field from the drop down. Select N if the ticket amount cannot be edited during the sale. Select Y if the ticket amount can be overridden during the sale. Select C if you want to use the pop up calculator to price this ticket based on length (typically used for truck type vehicles).

- Check Box Fields
- Is Parking Ticket: Check if this ticket is used for Parking Reservations.
- Pass Required: Check if this ticket requires a pass to be presented at check in.
- Taxable: This field is currently informational, indicates whether a ticket is taxable
- Round Trip: Check this box if the ticket type is a Round Trip ticket. When checked, both theoutbound and inbound lines on the tickets tab at the POS will be used to create the tickets.
- Edit Quantity: Check this if the quantity per ticket can be edited during the sale. This field istypically only used for group type tickets when you want to issue one ticket for a largegroup, instead of each person in the group having their own ticket.
- Surcharge: This field is informational only. Check if this ticket is subject to surcharges.
- Passenger: Check this if this ticket includes at least one passenger. Passenger tickets andvehicle tickets that include the driver would have this box checked.
- Roof Rack: Check if this ticket can have a roof rack.
- Bike Rack: Check if this ticket can have a bike rack.
- Parking Rule: Check this if this is a non-reservation type parking ticket. This rule produces awalk up, no reservation parking ticket at the POS.
- Bike: Check if this ticket includes a Bicycle.
- Auto: Check if this ticket includes an Auto.
- Trailer: Check if this ticket can have a trailer attached.
- Commercial: Check if this ticket is a Commercial Vehicle.
- Truck: Check if this ticket is a Truck type ticket.
- First Class: Check if this ticket is a first class type ticket.
- Casino: Check if this ticket is used to go to the Casino.
- Pay by Loyalty YN: Check if this ticket type can be paid for using loyalty points.
- Generate Loyalty YN: Check if this ticket type should generate loyalty when ticketed.
- Click the
 button to add the ticket type. Press
  to continue.
editing/deleting new ticket tpyes
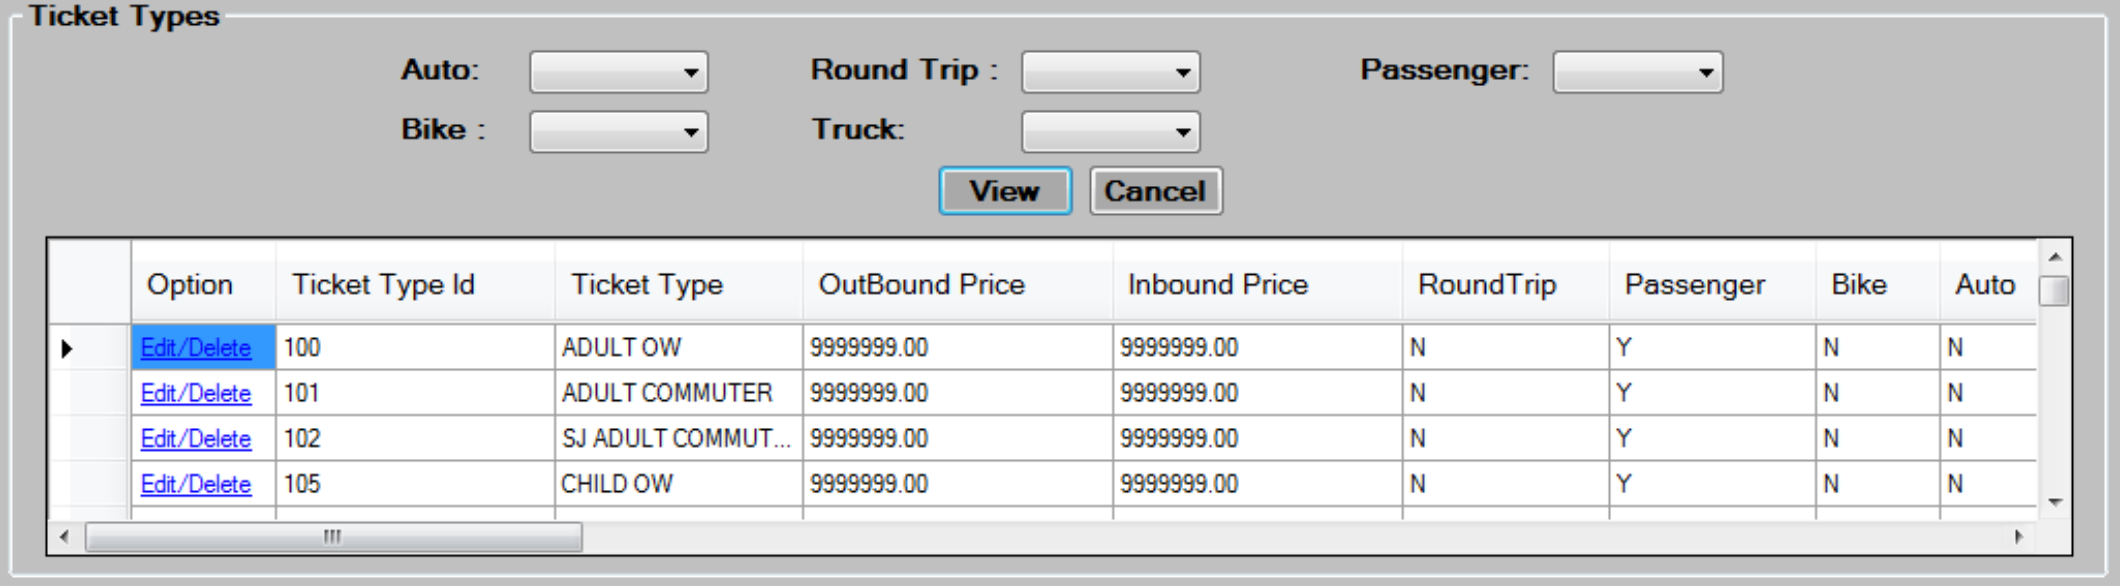
- Select from the filter criteria shown above, and then press the
 button to display the tickets.
 - Scroll to the appropriate ticket, and then press the
 link to load the existing data into the screen for editing.
 - Edit the data in the desired fields, as required. See the Add new ticket types section for a description of each field.
- Press the
 button to save changes then, press to continue.
 - To delete, select a Ticket Type by pressing the link, then press the
 button atthe bottom of the screen. Press to continue.